Monday, 19 February 2018

MisfireHandler: Error handling misfires: Unexpected runtime exception: null org.quartz.JobPersistenceException: Unexpected runtime exception: null

          MisfireHandler: Error handling misfires: Unexpected runtime exception: null
           org.quartz.JobPersistenceException: Unexpected runtime exception: null

Version:-11.1.2.3.0

Error:-

<Feb 19, 2018 4:28:47 PM IST> <Error> <org.quartz.impl.jdbcjobstore.JobStoreCMT> <BEA-000000> <MisfireHandler: Error handling misfires: Unexpected runtime exception: null
org.quartz.JobPersistenceException: Unexpected runtime exception: null [See nested exception: java.lang.NullPointerException]
        at org.quartz.impl.jdbcjobstore.JobStoreSupport.doRecoverMisfires(JobStoreSupport.java:3042)
        at org.quartz.impl.jdbcjobstore.JobStoreSupport$MisfireHandler.manage(JobStoreSupport.java:3789)
        at org.quartz.impl.jdbcjobstore.JobStoreSupport$MisfireHandler.run(JobStoreSupport.java:3809)
Caused By: java.lang.NullPointerException
        at org.quartz.SimpleTrigger.computeNumTimesFiredBetween(SimpleTrigger.java:800)
        at org.quartz.SimpleTrigger.updateAfterMisfire(SimpleTrigger.java:514)
        at org.quartz.impl.jdbcjobstore.JobStoreSupport.doUpdateOfMisfiredTrigger(JobStoreSupport.java:944)
        at org.quartz.impl.jdbcjobstore.JobStoreSupport.recoverMisfiredJobs(JobStoreSupport.java:898)
        at org.quartz.impl.jdbcjobstore.JobStoreSupport.doRecoverMisfires(JobStoreSupport.java:3029)
        at org.quartz.impl.jdbcjobstore.JobStoreSupport$MisfireHandler.manage(JobStoreSupport.java:3789)

        at org.quartz.impl.jdbcjobstore.JobStoreSupport$MisfireHandler.run(JobStoreSupport.java:3809)


CAUSE

Time value.

To Resolve above error from logs:- 

If your using a GTC connector, you need to update the newly created task's "Start date", System Management > Scheduler > *GTCTASK*,
1.      Logon to sysadmin console>schedulers>search for *GTCTASK *>
2.      Change start date time in all GTCTASKS and click on apply
3.      Take backup of tmp, cache and data folder and remove tmp, cache and data folders from all managed server location
4.      Restart Severs
Note: - The default date is 31 Dec 1969, upon being updated with the current date,
                or a date in the future, the exception is gone from the logs.
              (The problem here is that dates prior to UTC midnight 1 Jan 1970 are 
                expressed as negative numbers, and having a negative number as a 
                date causes this exception. Verify that the.Scheduled start times of 
                ALL OIM job instances are set to  sometime after Jan 1, 1970 UTC? Just set
               the start date to post 2000 and after a restart the error should go away.


java.lang.Exception:at org.jgroups.protocols.UDP._send(UDP.java:212) Error in OIM and SOA server logs

java.lang.Exception:at org.jgroups.protocols.UDP._send(UDP.java:212)
Error in OIM and SOA server logs

OIM Version:-11.1.2.3.0

Error:-

<Feb 19, 2018 3:04:10 PM IST> <Error> <org.jgroups.protocols.UDP> <BEA-000000> <failed sending message to null (58 bytes)
java.lang.Exception: dest=/224.255.1.75:45566 (61 bytes)
        at org.jgroups.protocols.UDP._send(UDP.java:212)
        at org.jgroups.protocols.UDP.sendToAllMembers(UDP.java:167)
        at org.jgroups.protocols.TP.doSend(TP.java:1102)
        at org.jgroups.protocols.TP.send(TP.java:1088)
        at org.jgroups.protocols.TP.down(TP.java:907)
        at org.jgroups.protocols.PING.sendMcastDiscoveryRequest(PING.java:276)
        at org.jgroups.protocols.PING.sendGetMembersRequest(PING.java:256)
        at org.jgroups.protocols.Discovery$PingSenderTask$1.run(Discovery.java:396)
        at java.util.concurrent.Executors$RunnableAdapter.call(Executors.java:471)
        at java.util.concurrent.FutureTask.runAndReset(FutureTask.java:304)
        at java.util.concurrent.ScheduledThreadPoolExecutor$ScheduledFutureTask.access$301(ScheduledThreadPoolExecutor.java:178)
        at java.util.concurrent.ScheduledThreadPoolExecutor$ScheduledFutureTask.run(ScheduledThreadPoolExecutor.java:293)
        at java.util.concurrent.ThreadPoolExecutor.runWorker(ThreadPoolExecutor.java:1145)
        at java.util.concurrent.ThreadPoolExecutor$Worker.run(ThreadPoolExecutor.java:615)
        at java.lang.Thread.run(Thread.java:745)
Caused By: java.io.IOException: Invalid argument
        at java.net.PlainDatagramSocketImpl.send(Native Method)
        at java.net.DatagramSocket.send(DatagramSocket.java:698)
        at org.jgroups.protocols.UDP._send(UDP.java:204)
        at org.jgroups.protocols.UDP.sendToAllMembers(UDP.java:167)
        at org.jgroups.protocols.TP.doSend(TP.java:1102)
        at org.jgroups.protocols.TP.send(TP.java:1088)
        at org.jgroups.protocols.TP.down(TP.java:907)
        at org.jgroups.protocols.PING.sendMcastDiscoveryRequest(PING.java:276)
        at org.jgroups.protocols.PING.sendGetMembersRequest(PING.java:256)
        at org.jgroups.protocols.Discovery$PingSenderTask$1.run(Discovery.java:396)
        at java.util.concurrent.Executors$RunnableAdapter.call(Executors.java:471)
        at java.util.concurrent.FutureTask.runAndReset(FutureTask.java:304)
        at java.util.concurrent.ScheduledThreadPoolExecutor$ScheduledFutureTask.access$301(ScheduledThreadPoolExecutor.java:178)
        at java.util.concurrent.ScheduledThreadPoolExecutor$ScheduledFutureTask.run(ScheduledThreadPoolExecutor.java:293)
        at java.util.concurrent.ThreadPoolExecutor.runWorker(ThreadPoolExecutor.java:1145)
        at java.util.concurrent.ThreadPoolExecutor$Worker.run(ThreadPoolExecutor.java:615)
        at java.lang.Thread.run(Thread.java:745)

>

To Resolve above Error:-


Add this property to the startup tab of the server in weblogic console if you have setup the oim server and soa server to start using the weblogic console:

1. Log in to the WebLogic Console.
2. Navigate to Environment -> Servers.
3. Click Lock and Edit.
4. Click on the OIM or SOA Managed server.
5. Click on the Server Start subtab
6. Add the following to the Arguments field:
  -Djava.net.preferIPv4Stack=true
  Note:-Add following argument field in all managed servers if it is cluster
7. Click Save.
8. Click Activate Changes.
9. Restart the managed WebLogic server

or

If you trying to start Managed servers using script or from back-end location
add following argument :-Djava.net.preferIPv4Stack=true in setDomainEnv.sh file

Note: Take backup of tmp, cache and data folders present 
           servers location of all managed  servers and restart servers.

If you’re having Managed servers in cluster nodes add following
 Argument: - -Djava.net.preferIPv4Stack=true in setDomainEnv.sh file
Present in all cluster nodes.

Take backup of tmp, cache and data folders present servers’ location of
Managed server and restart servers

Saturday, 10 February 2018

Loading Bulk Organisations Using Bulk Load Utility In OIM 12c (12.2.1.3.0)

          Loading Bulk Organisations Using  Bulk Load Utility In OIM 12c (12.2.1.3.0)

The Bulk Load utility is aimed at automating the process of loading a large amount of data into Oracle Identity Manager. It helps reduce the downtime involved in loading data. You can use this utility after you install Oracle Identity Manager or at any time during the production lifetime of Oracle Identity Manager. The Bulk Load utility can load users, accounts, roles, role hierarchy, role membership, role category data, and organizations

Modes of Running the Utility

The Bulk Load utility can be run in one of the following modes:
Offline mode: This is the traditional or existing mode.
                         To run the utility in offline mode, 
                         Oracle Identity Manager must be down.
Online mode: In online mode, there is no need to 
                        shut down Oracle Identity Manager.
                        online mode only implies that the utility can be run when
                        Oracle Identity Manager is  up and running.
                        It is still a command-line utility and no other interface
                        is available for online mode.

By default, Bulk Load utility runs in online mode.

To choose between the online or offline mode, consider the following factors:

At times, service availability is more important for business reasons.
Choose default online mode in this case.

If volume of new entities loaded is not huge, cost of service restart and index rebuild after offline bulkload is higher than slight performance degradation in online mode.
Choose default online mode in this case.

When load volume is high and existing system data is less in comparison, offline bulk load might have some advantages

Prerequisites to run the bulkload utility in OIM12C

Temporary table Space
While running the script, the script will create few temporary tables.

OIM_BLKLD_TMP_SUFFIX :  The script will first loads data from the CSV file into this table

OIM_BLKLD_EX_SUFFIX  : This table is used to hold data records that fail (are not loaded into Oracle Identity Manager) during a bulk load operation.

OIM_BLKLD_LOG : The utility inserts progress and error messages in the OIM_BLKLD_LOG table.

You can use either default OIM table space or separate table space to store these temporary tables. It is recommended to create and use a separate tablespace to store these temporary tables. If you want to use the OIM default table space, add space to this data file. You can add data file to oim database table space by running the oim_blkld_setup.sql script as explained below,

Login to OIM database as sysdba

Execute the oim_blkld_setup.sql

Enter the OIM default table space name

Name and full path of the data file to be added in OIM Database

Enter the OIM database username
Below is the location of oimbulkload in my case:-
1.)    /u03/idm/server/db/oim/oracle/Utilities/oimbulkload
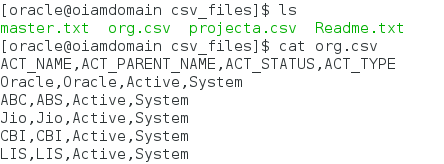
2.) In /u03/idm/server/db/oim/oracle/Utilities/oimbulkload/csv_files
     you should be able to see master.txt file and Readme.txt files
     org.csv file is file which we have created for loading organisation data
3.) In my case we have created the csv file with org.csv and placed file in
    the csv_files directory with the user data to be loaded.
4.) In master.txt file enter the name of csv file that should be used for
     Loading Organisations data and save in our case its org.csv
5.) Stop OIM server before running Bulk Load Utility
6.) Execute oim_blkld.sh script.
7.) Select the operation to perform bulkload utility
     Here in my case we are loading organisation data 
     so selected option as 7,select option here as per your requirement 
     and press enter
8.) Enter Database Details here as per location of db installed
     In my case location is
     /u01/app/oracle/product/12.1.0/db_1 as ORACLE_HOME
     Press Enter
9.) Once enter here it shows whether entered ORACLE_HOME is valid or not
10.) Here enter oim database connect string in following format
       //HostIPAddress:Port/ServiceName
       //HosIPAddress:1521/orcl  and click enter
11.) Enter Oracle Identity Manager (OIM) database user name
       In my case it is PROD_OIM provide db user name as per your requirement
12.) Once entered it will as to enter 
        OIM DB user password twice.Provide password twice and click on enter

13.) Enter password for OIM Db user again and click enter
14.) Select the input for organization load as per your requirement.
       In my case we are loading organisations via 
       CSV File so chosen option as 2 and enter
15.) Enter the name of the master file containing names of all 
       csv files to be loaded.Enter name as master.txt and enter

16.) Enter the Name of table space to be used for creating custom objects,
        by utility [PROD_OIM],Press enter by default PROD_OIM will be selected.
17.) Enter the date format for data load: MM-DD-YYYY
18.) Enter batch size for processing defined size as per your
      Requirement and press enter
19.) Do you wish to insert log messages if yes provide 
       value as Y and Enter and if no provide value as N and enter

Note:-Fix the issues with failed Organizations and execute 
           the utility again to load the failed  Organizations

22.) Temporary Tables Created
       OIM_BLKLD_TMP_{FILE_SUFFIX} : Loads data from csv into this table
       OIM_BLKLD_EX_{FILE_SUFFIX}: Stores data records that fail during
                                                                                  bulk load
       OIM_BLKLD_LOG: Logs errors and monitor progress

23.) Lets login to Identity Console and check the newly created Organizations.


Sunday, 4 February 2018

Using the Bulk Load Utility in OIM 12c (12.2.1.3.0)

                            Using the Bulk Load Utility in OIM 12c (12.2.1.3.0)

The Bulk Load utility is aimed at automating the process of loading a large amount of data into Oracle Identity Manager. It helps reduce the downtime involved in loading data. You can use this utility after you install Oracle Identity Manager or at any time during the production lifetime of Oracle Identity Manager. The Bulk Load utility can load users, accounts, roles, role hierarchy, role membership, role category data, and organizations


Modes of Running the Utility

The Bulk Load utility can be run in one of the following modes:
Offline mode: This is the traditional or existing mode.
                         To run the utility in offline mode, Oracle Identity Manager must be down.
Online mode: In online mode, there is no need to shut down Oracle Identity Manager.
                         online mode only implies that the utility can be run when 
                         Oracle Identity Manager is  up and running. It is still a command-line
                         utility and no other interface is available for online mode.

By default, Bulk Load utility runs in online mode.

To choose between the online or offline mode, consider the following factors:

At times, service availability is more important for business reasons.
Choose default online mode in this case.

If volume of new entities loaded is not huge, cost of service restart and index rebuild after offline bulkload is higher than slight performance degradation in online mode. 
Choose default online mode in this case.

When load volume is high and existing system data is less in comparison, offline bulk load might have some advantages

Prerequisites to run the bulkload utility in OIM12C

Temporary table Space

While running the script, the script will create few temporary tables.

OIM_BLKLD_TMP_SUFFIX :  The script will first loads data from the CSV file into this table

OIM_BLKLD_EX_SUFFIX  : This table is used to hold data records that fail (are not loaded into Oracle Identity Manager) during a bulk load operation.

OIM_BLKLD_LOG : The utility inserts progress and error messages in the OIM_BLKLD_LOG table.
You can use either default OIM table space or separate table space to store these temporary tables. It is recommended to create and use a separate tablespace to store these temporary tables. If you want to use the OIM default table space, add space to this data file. You can add data file to oim database table space by running the oim_blkld_setup.sql script as explained below,

Login to OIM database as sysdba

Execute the oim_blkld_setup.sql

Enter the OIM default table space name

Name and full path of the data file to be added in OIM Database

Enter the OIM database username

Create OIM user to copy password

Login to OIM server and create a new user.

This password for this user will be copied as the default password for all the users created by oimbulkload utility.


Below is the location of oimbulkload in my case:-
1.)/u03/idm/server/db/oim/oracle/Utilities/oimbulkload
2.)In /u03/idm/server/db/oim/oracle/Utilities/oimbulkload/csv_files
    you should be able to see master.txt file and Readme.txt files
    projecta.csv file is file which we have created for loading user data
3.) In my case we have created the csv file with projecta.csv and placed file in 
     the csv_files directory with the user data to be loaded
4.)In master.txt file enter the name of csv file that should be used for
    loading user data and save in our case its projecta.csv
5.) Stop OIM server before running Bulk Load Utility
6.) Execute oim_blkld.sh script.
7.)Select the operation to perform bulkload utility
     Here in my case we re loading user data so selected option as 1,
     select option here as per your requirement and press enter
8.)Enter Database Details here as per location of db installaed
    In my case location is:-/u01/app/oracle/product/12.1.0/db_1 as ORACLE_HOME
    Press Enter     
9.)Once enter here it shows whether entered ORACLE_HOME is valid or not
10.)Here enter oim database connect string in following format
    //HostIPAddress:Port/ServiceName
    //HosIPAddress:1521/orcl  and click enter
11.)Enter Oracle Identity Manager (OIM) database user name
       In my case it is PROD_OIM provide db user name as per your requirement
12.)Once entered it will as to enter OIM DB user password twice
      Provide password twice and click on enter
13.)Enter password for OIM Db user again and click enter
14.)Select the input for user load as per your requirement.
      In my case we are loading users via CSV File so choosen option as 2 and enter
15.)Enter the name of the master file contining names of all csv files to be loaded
Enter name as master.txt and enter
16.)Enter the Name of tablespace to be used for creating custom objects,
      by utility [PROD_OIM],Press enter by default PROD_OIM will be selected.
17.)Enter the date format for data load:
      MM-DD-YYYY
18.)Enter batch size for processing defined size as per your
      requirement and press enter
19.)Do you wish to insert log msgs if yes provide value as Y and
      Enter and if no provide value as N and enter
20.)Enter User ID (USR_LOGIN),of the user created from web console
      provide value as xelsysadm and click enter
21.)Enter User ID (USR_LOGIN),of the user created from web console
      provide value as xelsysadm and click enter
Note:-Fix the issues with failed users and execute the utility again to load the failed users 
22.)Temporary Tables Created
       OIM_BLKLD_TMP_{FILE_SUFFIX} : Loads data from csv into this table
       OIM_BLKLD_EX_{FILE_SUFFIX}: Stores data records that fail during bulk load
       OIM_BLKLD_LOG: Logs errors and monitor progress

23.) Lets login to Identity Console and check the newly created users.


Thursday, 4 January 2018

Installation of Oracle Internet Directory 12c Software and 12c Infrastructure Software In Collocated Mode

       Installation of Oracle Internet Directory 12c Software and 12c Infrastructure 
                                     Software In Collocated Mode

      Installation of 12c "Oracle Fusion Middleware infrastructure" Software
      must be done as a first step
      Installation of OID and OID setup
            1. Installation of 12c "Oracle Fusion Middleware infrastructure"
                Software must be done as a first step.
                Execute following command and follow the screen shots.
            1.1 .Go to the location where software’s are placed in your environment
                     In my case it is /home/oracle/IDAM12C/OIMInfra

           1.2. Inside OIMInfra you should be able to see 
                  fmw_12.2.1.3.0_infrastructure_Disk1_1of1
           1.3 Execute below command and follow the screen shots.
                 java –jar fmw_12.2.1.3.0_infrastructure.jar
 
         Once you hit enter on above command you should be able to get GUI 
         window for installation  and below screen shots are as following:
                  1.  Select Next
                  2. Choose whichever option you need.
                      Here it has been Selected option to skip Auto updates.Select Next
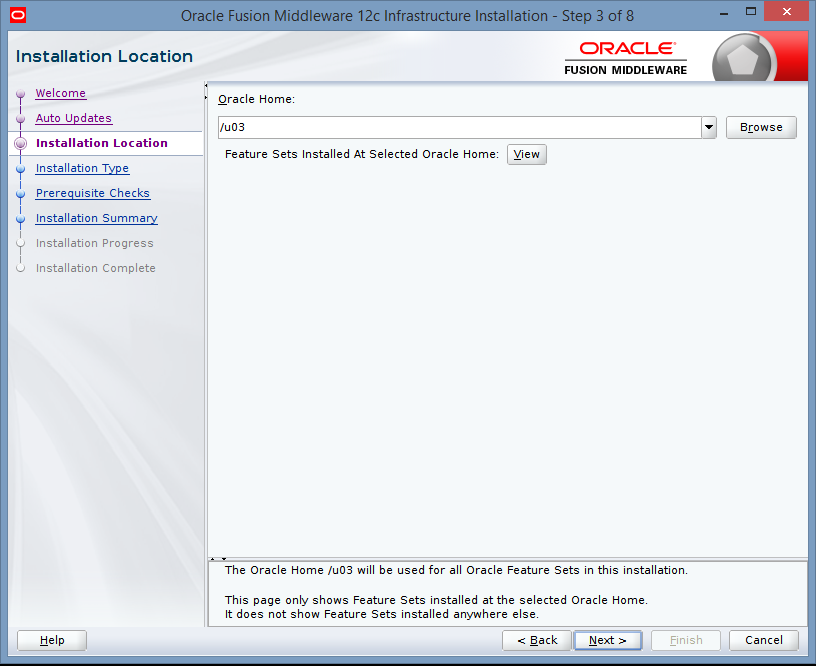
                   3. Choose the directory into which Infrastructure 
                       must be installed Select Oracle_HOME as /u04 and
                       select Next(In my case Oracle_Home is /u04 defined your location
                       as per your environment)
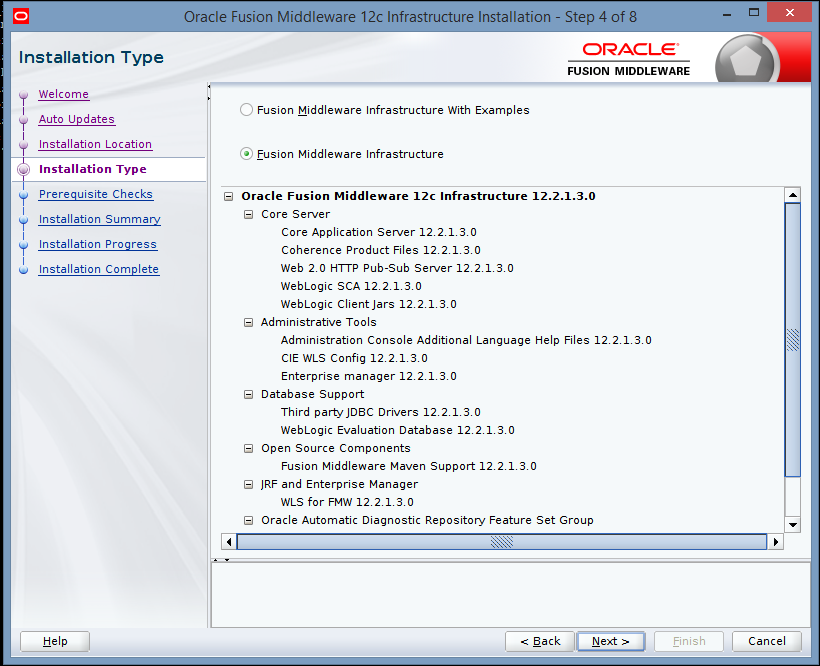
 4. In Installation Fusion Middleware Infrastructure is selected by default.
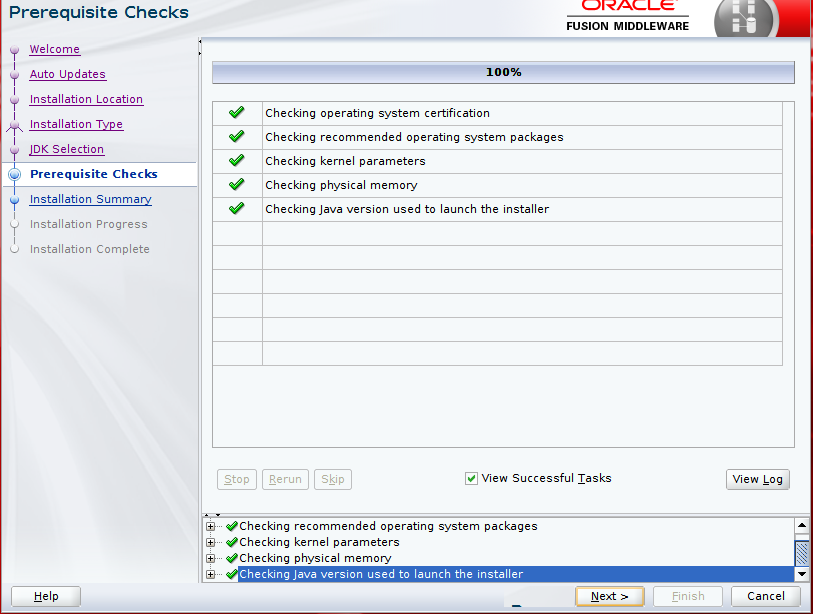
                        5. Select Next and wait for completion to 100%.
                            Here it will check for operating system certification and java version
                            used to launch the installer
                     6. In installation summary if you want to save Response File save it 
                         and click on Install.
                     7. Click on Next and wait until its completes 100%
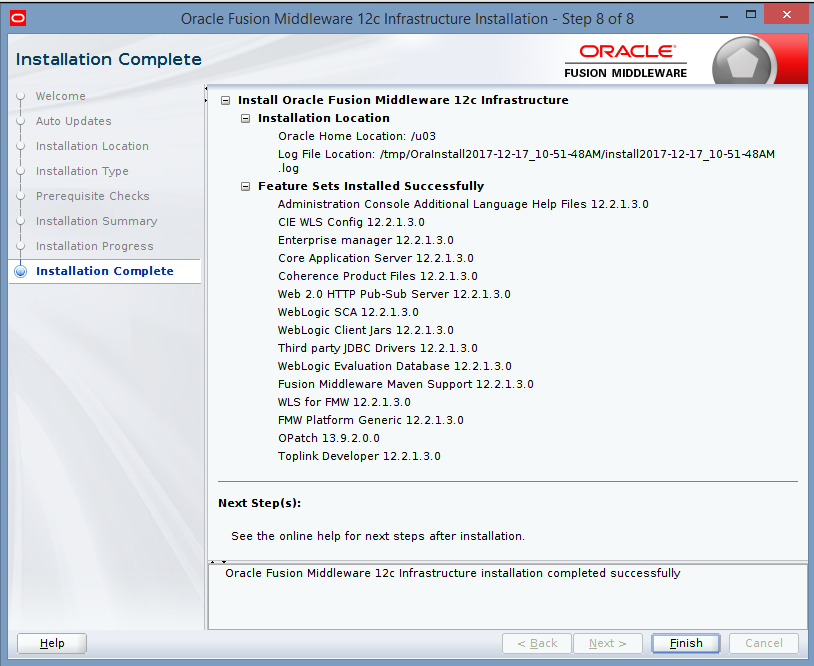
                     8. Click on Finish

2. Installation Of OID12C

             2.1 .Go to the location where software’s are placed in your environment
                     In my case it is /home/oracle/IDAM12C/OID
             2.2. Inside OID folder you should be able to see
                    fmw_12.2.1.3.0_oid_linux64.bin             
2.3 run ./fmw_12.2.1.3.0_oid_linux64.bin 
           2.4 In my case installation type is collocated, and install OID.
                 Collocated mode would expect FMW Infrastructure
                 installed in Oracle Home.Screen shots for reference are as following:
                 1. Select Next
                   2. Choose whichever option you need. 
                       Here it has been selected option to skip Auto updates.
                        Select Next
             3.  Choose the directory into which Infrastructure must be installed.
                 Select Oracle_HOME as /u04 and select Next
                (In my case Oracle_Home is /u04
                 Defined your location as per your environment)
            4. In Installation type Collocated Mode is selected.
                In Other option Standalone is not allowed since 
                we have chosen Infrastructure Oracle Home location in previous step.
                Select Next.                                
              5. Specify JDK location as per your location and click on Next
          6. Click on Next and wait until its completes 100%
             7. In installation summary if you want to save Response 
                File save it and click on Install 
            8. Click on Next and wait until its completes 100%
            9.Click on Finish

3. To Configure OID in the same domain .That is in Collocated Mode.
          1. Creation of Schema using RCU: Creating database schema using 
              Repository Creation Utility to be installed and configured. 
              The database should be up and running.
          1.1. Start the RCU – Execute following command
               /u04/oracle_common/bin/rcu
               In this case we are using location :- /u04/oracle_common/bin/rcu
               Screen shots are as follows below
          1.2. Once if you hit. /rcu you will get GUI window
                 In Repository Creation Utility welcome screen Select Next
        1.3. In Create Repository by default “Create Repository” and
              “System Load and Product Load is selected. Select Next
           1.4. In Database connection details you must provide your
                  Oracle Database details and click on Next
                Note:-Ensure your Oracle Database is up and running. Note here
                         “Connection Parameters”option is selected. And Database
                          Type selected is “Oracle Database”
           1.5. Here it will check for prerequisites and select ok once it completes.
           1.6  In my case PROD2 is given.
                  And also choose Oracle Internet Directory schema as below and
                  click on Next.
               1.7. Here it will check for component Prerequisites,
                      once checking is done select ok.
          1.8. In Schema Passwords section in my case I am using same password for all
                 Schema is selected by default.
                 Provide a password and select next                          
             1.9. In Map Table-spaces screen select Next
             2.0. Select Ok on pop up window
               2.1. Select Ok on pop up window once it completes
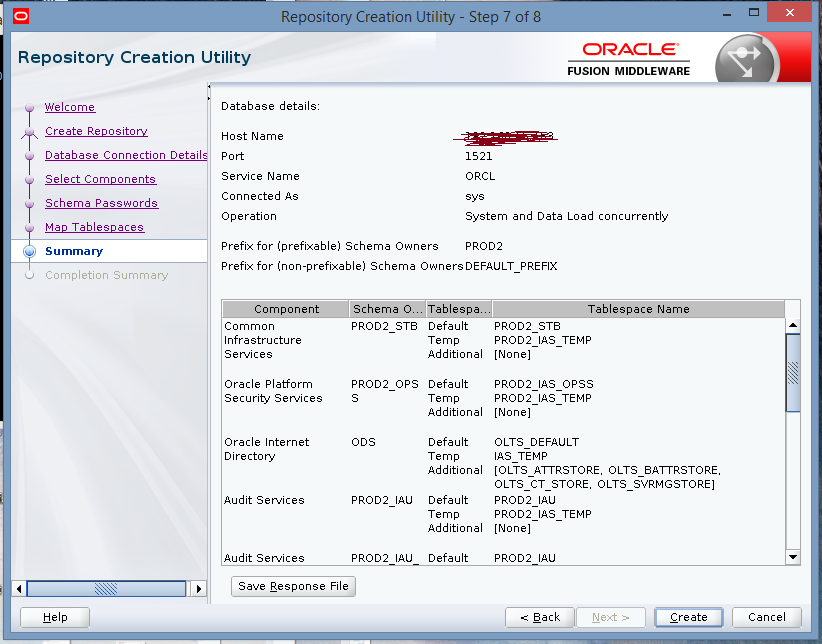
               2.2. Save response file if required for reference. Note down database details
                      and click on create
               2.3. Once it is complete in completion summary note down rcu log and
                      other log paths it shows.
                           And click on Close                              

4. Configuring OID domain using the configuration wizard
     1.1 In my case in following below location
           /u04/oracle_common/common/bin
     1.2 Run ./config.sh 
     1.3 Following below screen appears
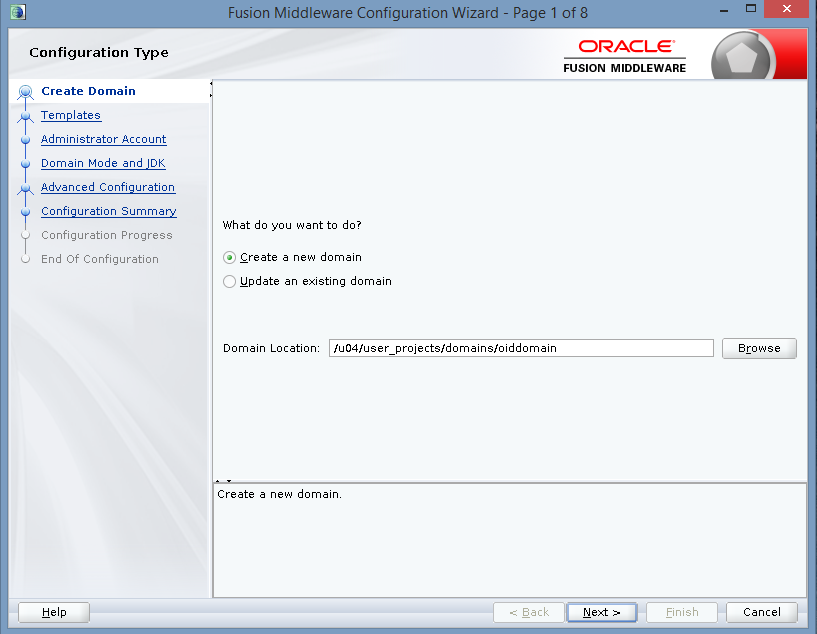
           Default Create a new Domain is selected.
           It would be the same as OID and Infrastructure directory Path 
           (in my case it is /u04/) under which, Domain must be created.
           In my case Domain Location is /u04/user_projects/domain/oiddomain
           Select Next.
        1.4. Choose Oracle Internet Directory -12.2.1.3.0 [oid] and
               Oracle Directory Service Manager - 12.2.1.3.0[oid] template
               under Templates wizard  screen.
               Note that this makes Oracle JRF auto selected.
               Select Next
         1.5. Specify Domain Name,Domain Location , and Application Location
          1.6 In Administrator Account provide a username.
                Weblogic is the default username it takes.
                You can continue or change the name.
                Here weblogic username is given. Select Next 
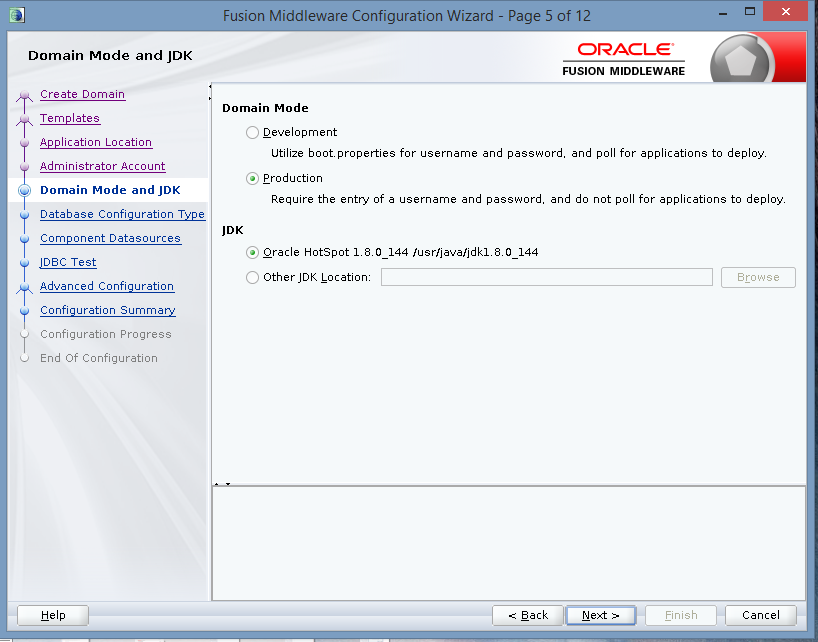
            1.7. In Domain Mode and JDK choose either of the option.
                   Here in my case Production is selected.
                   Ensure JDK path is correct.
                  Select Next   
            1.8. In Database Configuration Type select auto configuration type as
                   RCU data in my case I have selected as RCU Data if you want to select
                   Manual Configuration you can go ahead with Manual configuration also
            1.9  Provide database details in which schema's were created using
                   RCU in previous step, under Database Configuration Type screen.
                   Under Connection Parameters provide correct details.
            2.0  Click/select Get RCU Configuration.
           2.1. Click on Get RCU Configuration you should able to see a successfully
                   done message at  bottom of  the screen. Then click on Next to continue
           2.2. If you are going with Manual Configuration provide as below 
                 info required or click on Next
           2.3. In JDBC test ensure that test selected are successful .
                  Once successful click on Next
             2.4. In Advanced Configuration do not select any component until
                    and unless if you want to set some advanced configurations.
                    Here in my case i have selected
                    Administration Server, Node Manager, Topology,
                    Note:-Select Options as per your requirement.
                     Then click on Next                             
               2.5 In Administration Server provide Server Name,Listen Address,
                     Listen Port If you want to use SSL select Enable SSL or Click on Next
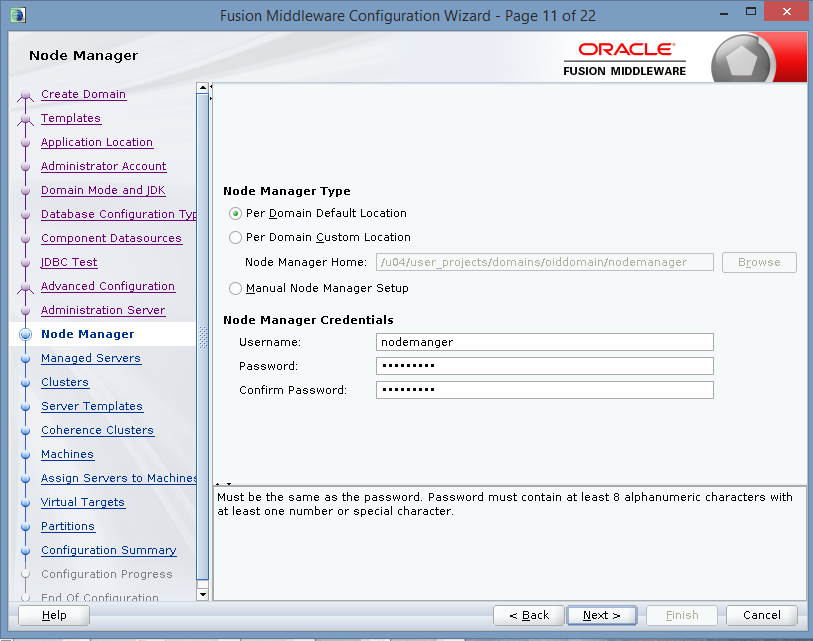
                2.6 In Node Manager configuration in my case i am using
                      Node Manager Type as Per Domain Default location.
                      Base on requirement you can choose Node Manager Type
                      and provide Node Manger credentials and click on Next
                     2.7 Click on Next
                     2.8 Click on Next
                       2.9 Click on Next
                       3.0 Click on Next
                         3.1 In Machine add Machine and click on Next
                       3.2 Assign Servers to Machine oidhost1
                          3.3 Click on Next
                       3.4 Click on Next
                      3.5 Click on Next
                    3.6 Click on Create
                     3.7  In Configuration Process you must see
                             the next screen with 100%. once done click on Next
                     3.8  In End Configuration you can able to see
                              Domain Location and Admin Server URL.
                              Then Click on Finish

5.Creating OID Instance using wlst tool
1.Go to below location:-/u04/oralce_common/common/bin
run ./wlst.sh
                                 2. Once you have run ./wlst.sh it will be connected to
                                     Weblogic Server Administration Scripting Shell
                                     To connect use following commands as per below screenshot
                                              1.connect()
                                              2.Enter username as weblogic
                                              3.Enter your password
                                              4.Enter your server URL and click on Enter                           
                                3.run the 'oid_setup()' command to create the initial
                                   'oid1' system component.In its most basic state the command 
                                   only requires the 'orcladminPassword', 'odsPassword', 
                                   and 'realmDN' parameters.This will create the 'oid1' instance 
                                   with the default Non-SSL port of 3060 and the SSL port of 3131.

Command:-oid_setup(orcladminPassword='XXXXXX',odsPassword='XXXXXX',
                   realmDN='dc=projectA,dc=com')
Note:-Once above command completed the 'oid1' instance will be started.
                              4. Once completed we can verify the installation.
                                  Use the wlst command 'oid_listInstances()'to list all
                                  OID instances in this domain
                              5. Run 'oid_instanceStatus()' to review the status of a
                                 specific instance
                               6.  Run 'oid_getProperties()' to retrieve details such as how EM is
                                   set to connect to OID
           Note: - You can test basic connectivity to the OID Non-SSL and SSL
                        Ports with the $ORACLE_HOME/bin/ldapbind command.

Testing:-

1. Go to below path and start Weblogic server and ODS managed servers.
     /u04/user_projects/domains/OIDdomain/bin/startWeblogic.sh
     /u04/user_projects/domains/OIDdomain/bin/startManagedWeblogic.sh
      wls_ods1
2. Access the Weblogic,ODSM URL from Chrome, Firefox or I.E etc... and
       verify its working fine.

Below are screenshots for reference

Now you should be able to logon and perform other tests and config changes etc…
1. WLS Admin console (as the WebLogic Admin user)
               http[s]://<hostname>:9001/console
2. FMW Control (as the WebLogic Admin user) 
                http[s]://<hostname>:9001/em
3. ODSM Console
                  http[s]://<hostname>:9001/odsm
                  Once you logon to odsm console from browser
                  Click on connect to a directory and click on create a connection
                  Select Directory Type as OID and provide server,port,
                  username and password details and click on connect.


Thanks,
Aditya.