Installation of Oracle Internet Directory 12c Software and 12c Infrastructure
Software In Collocated Mode
Installation of 12c "Oracle Fusion Middleware infrastructure" Software
must be done as a first step

 1.3 Execute below command and follow the screen shots.

 2.
Choose whichever option you need.
2.
Choose whichever option you need.
Here it has been Selected option to skip Auto updates.Select Next
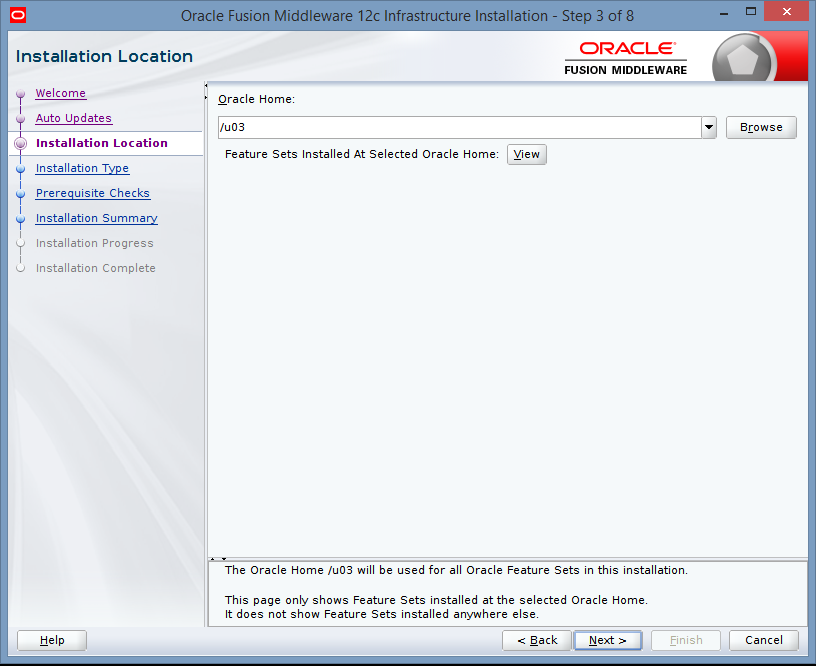
 3.
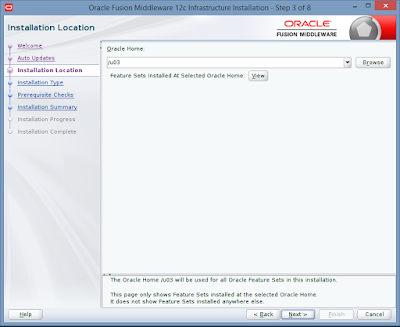
Choose the directory into which Infrastructure
3.
Choose the directory into which Infrastructure
must be installed Select Oracle_HOME as /u04 and
select Next(In my case Oracle_Home is /u04 defined your location
 5.
Select Next and wait for completion to 100%.
5.
Select Next and wait for completion to 100%.
 6. In
installation summary if you want to save Response File save it
6. In
installation summary if you want to save Response File save it
and click on Install.
 7. Click
on Next and wait until its completes 100%
7. Click
on Next and wait until its completes 100%
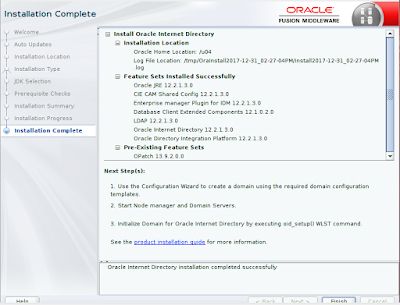
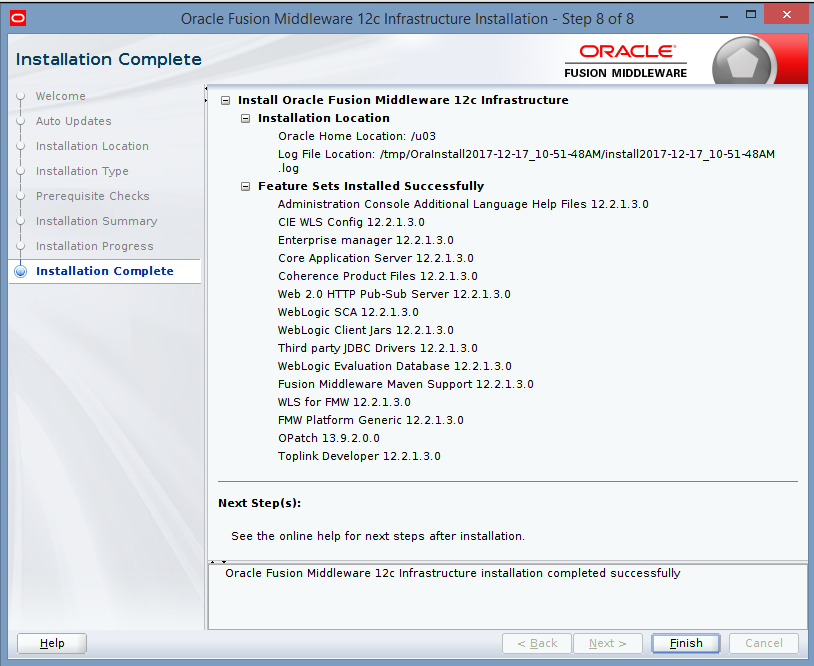
 8. Click on Finish


 2.4 In
my case installation type is collocated, and install OID.
2.4 In
my case installation type is collocated, and install OID.

 3. Choose the directory into which Infrastructure must be installed.
 4. In
Installation type Collocated Mode is selected.
4. In
Installation type Collocated Mode is selected.
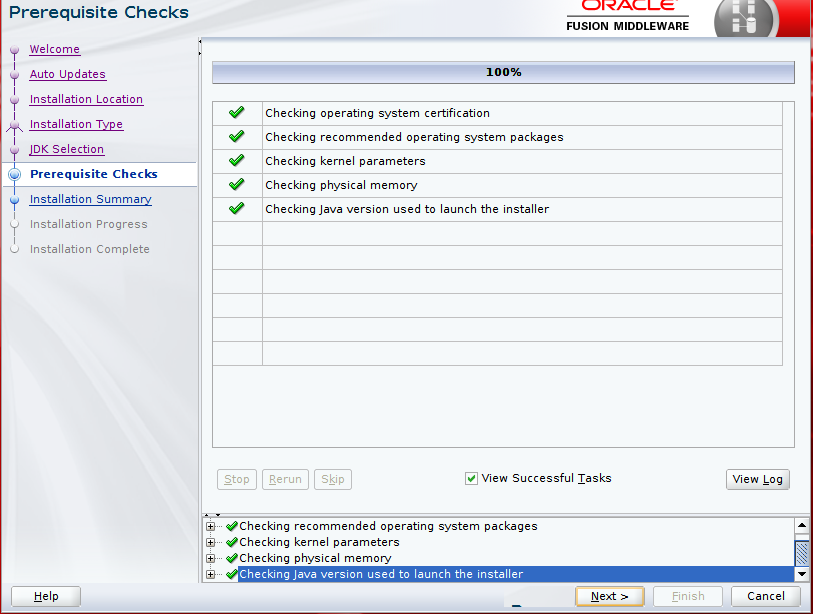
 5. Specify JDK location as per your location and click on Next
 6. Click on Next and wait until its completes 100%
 8. Click on Next and wait until its completes 100%
 9.Click on Finish
 1.3. In Create Repository by default “Create Repository” and
“System Load and Product Load is selected. Select Next
 1.4. In Database connection details you must provide your
Oracle Database details and click on Next
 1.5. Here it will check for prerequisites and select ok once
it completes.
1.5. Here it will check for prerequisites and select ok once
it completes.
 1.6 In my case PROD2
is given.
1.6 In my case PROD2
is given.
 1.7. Here it will check for component Prerequisites,
once checking is done select ok.
 1.8. In Schema Passwords section in my case I am using same
password for all
1.8. In Schema Passwords section in my case I am using same
password for all
 1.9. In Map Table-spaces screen select Next
 2.0. Select Ok on pop up window

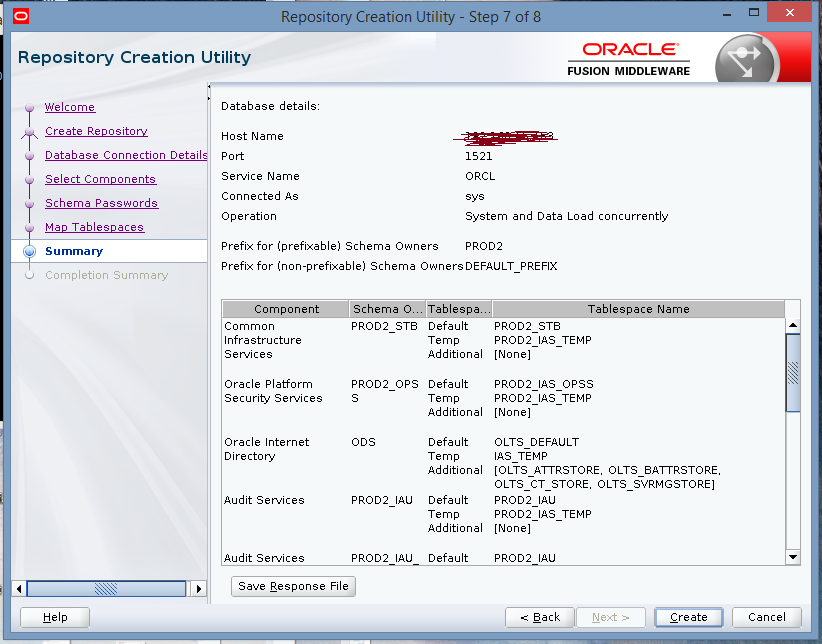
 2.2. Save response file if required for reference. Note down
database details
2.2. Save response file if required for reference. Note down
database details
and click on create
 2.3. Once it is complete in completion summary note down rcu
log and
2.3. Once it is complete in completion summary note down rcu
log and

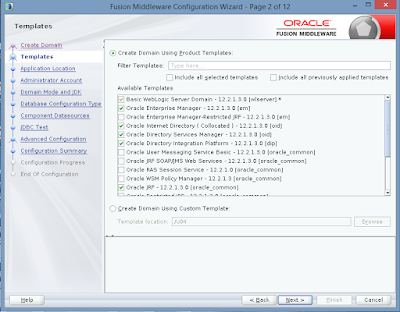
 1.4. Choose Oracle Internet Directory -12.2.1.3.0 [oid] and
 1.5. Specify Domain Name,Domain Location , and Application Location
 1.6 In Administrator Account provide a username.
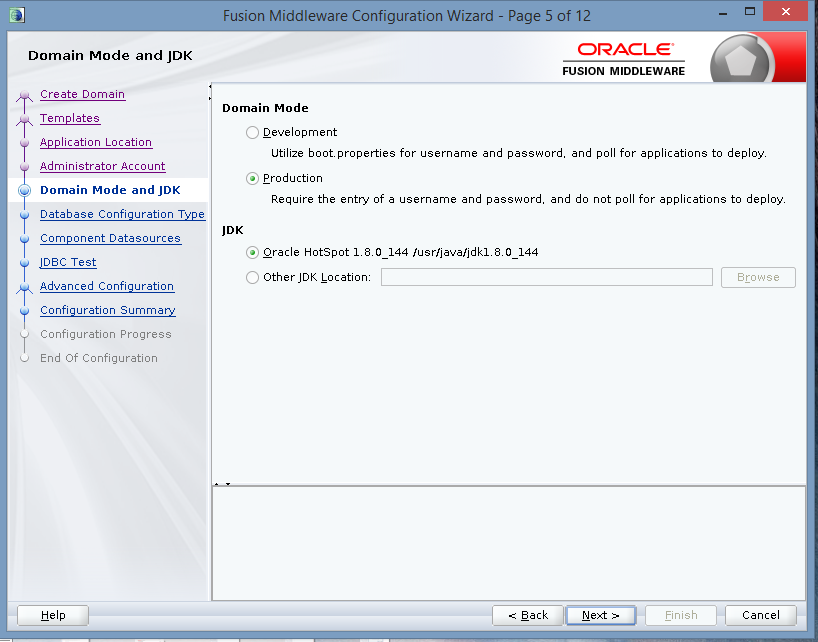
 1.7. In Domain Mode and JDK choose either of the option.
Here in my case Production is selected.
Ensure JDK path is correct.
Select Next
 1.8. In Database Configuration Type select auto configuration type as
RCU data in my case I have selected as RCU Data if you want to select
Manual Configuration you can go ahead with Manual configuration also
1.9 Provide database details in which schema's were created using
RCU in previous step, under Database Configuration Type screen.
Under Connection Parameters provide correct details.
2.0 Click/select Get RCU Configuration.
 2.1. Click on Get RCU Configuration you should able to see a
successfully
2.1. Click on Get RCU Configuration you should able to see a
successfully

 2.3. In
JDBC test ensure that test selected are successful .
2.3. In
JDBC test ensure that test selected are successful .
Once successful click on Next
 2.4. In Advanced Configuration do not select any component until
and unless if you want to set some advanced configurations.
Here in my case i have selected
Administration Server, Node Manager, Topology,
 2.5 In Administration Server provide Server Name,Listen Address,
Listen Port If you want to use SSL select Enable SSL or Click on Next
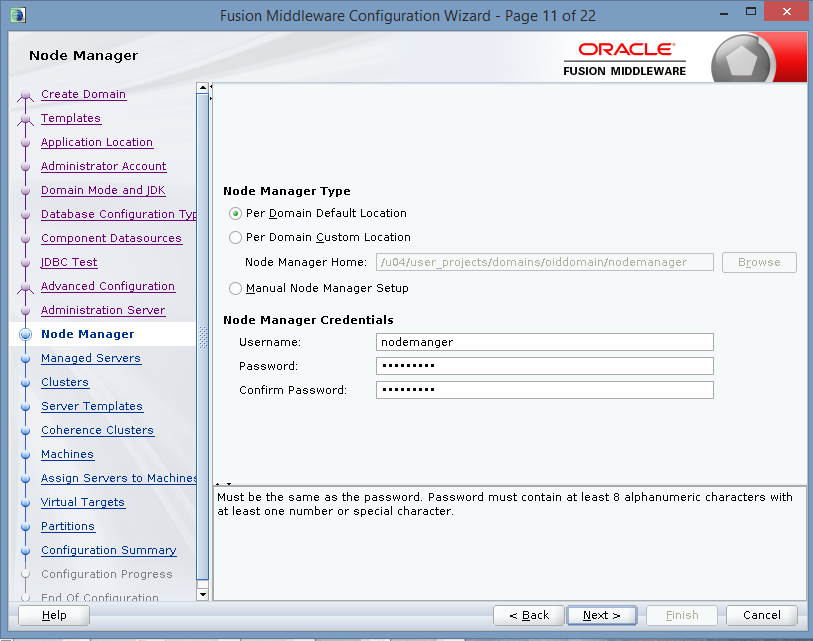
 2.6 In Node Manager configuration in my case i am using
Node Manager Type as Per Domain Default location.
Base on requirement you can choose Node Manager Type
and provide Node Manger credentials and click on Next
 2.7 Click on Next
 2.8 Click on Next
 2.9 Click on Next
 3.0 Click on Next
 3.1 In Machine add Machine and click on Next
 3.2 Assign Servers to Machine oidhost1
 3.3 Click on Next
 3.4 Click on Next
 3.5 Click on Next
 3.6 Click on Create
 3.7 In Configuration Process you must see
 3.8 In End Configuration you can able to see

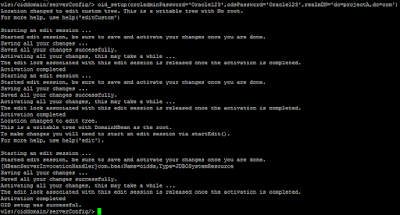
 2. Once you have run ./wlst.sh it will be connected to
Weblogic Server Administration Scripting Shell
To connect use following commands as per below screenshot
1.connect()
2.Enter username as weblogic
3.Enter your password
4.Enter your server URL and click on Enter
 3.run the 'oid_setup()' command to create the initial
 Note:-Once above command completed the 'oid1' instance will be
started.
Note:-Once above command completed the 'oid1' instance will be
started.
Use the wlst command 'oid_listInstances()'to list all
OID instances in this domain
 5. Run
'oid_instanceStatus()' to review the status of a
5. Run
'oid_instanceStatus()' to review the status of a
specific instance
 6. Run 'oid_getProperties()'
to retrieve details such as how EM is
6. Run 'oid_getProperties()'
to retrieve details such as how EM is
set to connect to OID
 Note: - You can test basic connectivity to the OID Non-SSL
and SSL
Note: - You can test basic connectivity to the OID Non-SSL
and SSL


Thanks,
Aditya.
Software In Collocated Mode
Installation of 12c "Oracle Fusion Middleware infrastructure" Software
must be done as a first step
Installation of OID and OID setup
1.
Installation of 12c "Oracle Fusion Middleware infrastructure"
Software must be done as a first step.
Execute following command and follow the screen shots.
1.1 .Go to
the location where software’s are placed in your environment
In my case it is /home/oracle/IDAM12C/OIMInfra

1.2.
Inside OIMInfra you should be able to see
fmw_12.2.1.3.0_infrastructure_Disk1_1of1
fmw_12.2.1.3.0_infrastructure_Disk1_1of1

java
–jar fmw_12.2.1.3.0_infrastructure.jar

Once you hit enter on above command you should be
able to get GUI
window for installation and below screen shots are as following:
window for installation and below screen shots are as following:
1. Select Next

Here it has been Selected option to skip Auto updates.Select Next

must be installed Select Oracle_HOME as /u04 and
select Next(In my case Oracle_Home is /u04 defined your location
as per your environment)
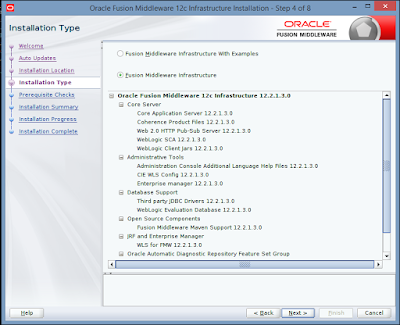
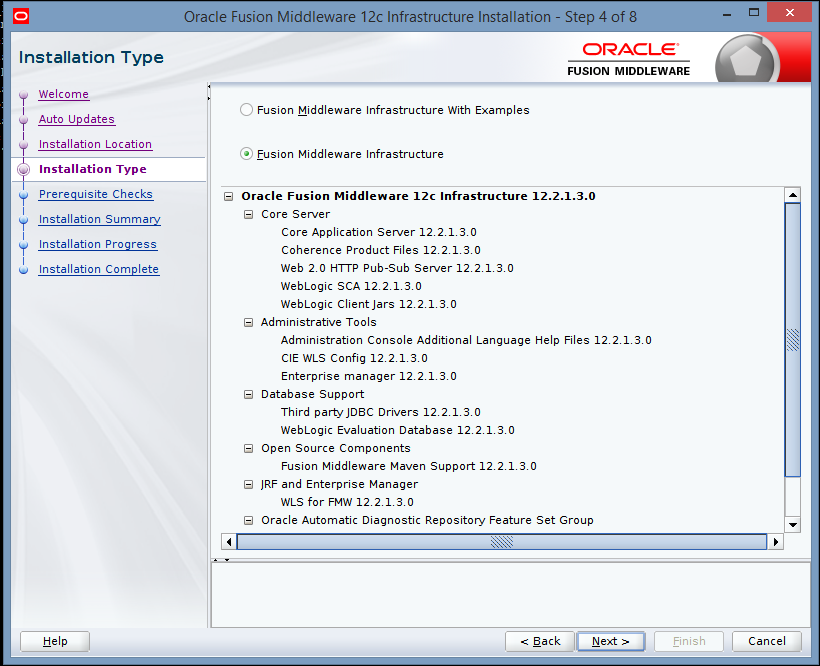
4. In Installation Fusion Middleware Infrastructure is selected by default.
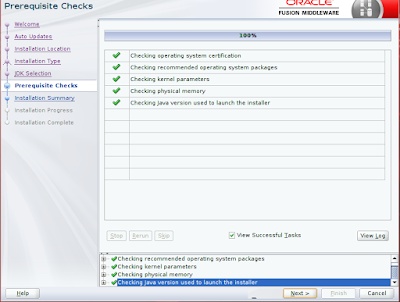
Here it will check for operating system
certification and java version
used to launch the installer

and click on Install.


2. Installation Of OID12C
2.1 .Go
to the location where software’s are placed in your environment
In my case it is
/home/oracle/IDAM12C/OID
2.2.
Inside OID folder you should be able to see
fmw_12.2.1.3.0_oid_linux64.bin

2.3 run ./fmw_12.2.1.3.0_oid_linux64.bin
Collocated mode would expect FMW
Infrastructure
installed in Oracle Home.Screen shots for reference are as
following:
1. Select Next

2. Choose whichever option you need.
Here it has been selected option to skip Auto updates.
Select Next

Select Oracle_HOME as /u04 and select Next
(In my case Oracle_Home is /u04
Defined your location as per your environment)

In Other option Standalone is not allowed
since
we have chosen Infrastructure Oracle Home location in previous step.


7. In installation summary
if you want to save Response
File save it and click on Install


3. To Configure OID in the same domain .That is
in Collocated Mode.
1. Creation of
Schema using RCU: Creating database schema using
Repository Creation Utility to be
installed and configured.
The database should be up and running.
1.1. Start the
RCU – Execute following command
/u04/oracle_common/bin/rcu
In this case
we are using location :- /u04/oracle_common/bin/rcu
Screen shots
are as follows below
1.2. Once if you hit. /rcu you will get GUI window
In
Repository Creation Utility welcome screen Select Next

“System Load and Product Load is selected. Select Next

Oracle Database details and click on Next
Note:-Ensure
your Oracle Database is up and running. Note here
“Connection
Parameters”option is selected. And Database
Type selected
is “Oracle Database”


And also choose
Oracle Internet Directory schema as below and
click on Next.

once checking is done select ok.

Schema is
selected by default.
Provide a
password and select next


2.1. Select Ok on pop up window once it completes

and click on create
other log paths
it shows.
And click on Close 
4. Configuring OID domain using the configuration wizard
1.1 In my case in following below location
/u04/oracle_common/common/bin
/u04/oracle_common/common/bin
1.2 Run ./config.sh
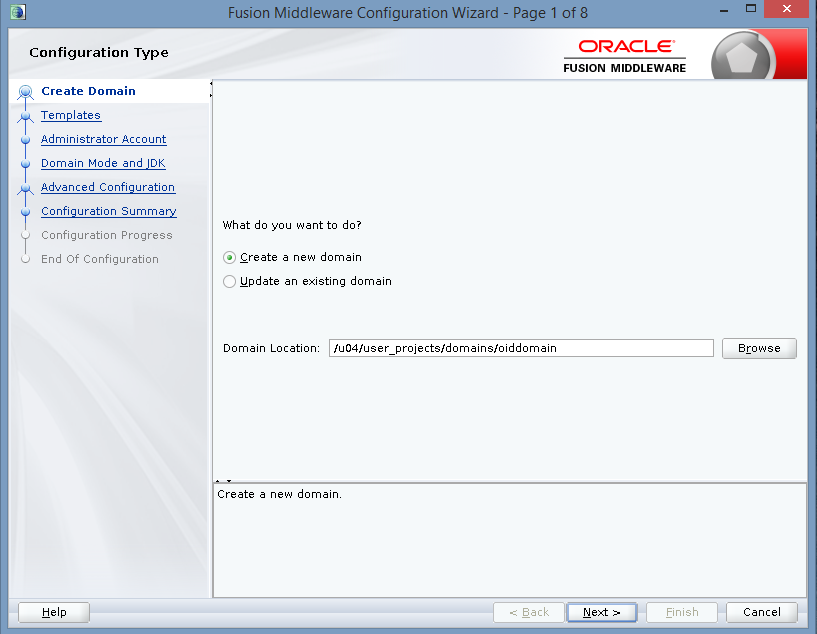
1.3 Following below screen appears
Default Create a
new Domain is selected.
It would be the
same as OID and Infrastructure directory Path
(in my case it is /u04/) under which,
Domain must be created.
In my case
Domain Location is /u04/user_projects/domain/oiddomain
Select Next.
Oracle Directory Service Manager -
12.2.1.3.0[oid] template
under Templates wizard screen.
Note
that this makes Oracle JRF auto selected.
Select Next


Weblogic is the default username it takes.
You can continue or change the name.
Here weblogic username is given. Select Next

Here in my case Production is selected.
Ensure JDK path is correct.
Select Next
RCU data in my case I have selected as RCU Data if you want to select
Manual Configuration you can go ahead with Manual configuration also
1.9 Provide database details in which schema's were created using
RCU in previous step, under Database Configuration Type screen.
Under Connection Parameters provide correct details.
2.0 Click/select Get RCU Configuration.

done message
at bottom of the screen. Then click on Next to continue

2.2. If you are going with Manual Configuration provide as
below
info required or click on Next

Once successful click on Next

and unless if you want to set some advanced configurations.
Here in my case i have selected
Administration Server, Node Manager, Topology,
Note:-Select Options as per your requirement.
Then
click on Next

Listen Port If you want to use SSL select Enable SSL or Click on Next

Node Manager Type as Per Domain Default location.
Base on requirement you can choose Node Manager Type
and provide Node Manger credentials and click on Next


the next
screen with 100%. once done click on Next

Domain Location and Admin
Server URL.
Then Click on Finish

5.Creating OID Instance using wlst tool
1.Go to below location:-/u04/oralce_common/common/bin
run ./wlst.sh

Weblogic Server Administration Scripting Shell
To connect use following commands as per below screenshot
1.connect()
2.Enter username as weblogic
3.Enter your password
4.Enter your server URL and click on Enter

'oid1' system component.In its most basic state the command
only requires the 'orcladminPassword', 'odsPassword',
and 'realmDN' parameters.This will create the 'oid1' instance
with the default Non-SSL port of 3060 and the SSL port of 3131.
Command:-oid_setup(orcladminPassword='XXXXXX',odsPassword='XXXXXX',
realmDN='dc=projectA,dc=com')

Use the wlst command 'oid_listInstances()'to list all
OID instances in this domain

specific instance

set to connect to OID

Ports with the $ORACLE_HOME/bin/ldapbind
command.
Testing:-
1. Go to below path
and start Weblogic server and ODS managed servers.
/u04/user_projects/domains/OIDdomain/bin/startWeblogic.sh
/u04/user_projects/domains/OIDdomain/bin/startManagedWeblogic.sh
wls_ods1
2. Access the
Weblogic,ODSM URL from Chrome, Firefox or I.E etc... and
verify its working fine.
Below are screenshots for reference
Now you should be able to logon and perform other tests and config changes etc…
1. WLS Admin console (as the WebLogic Admin user)
http[s]://<hostname>:9001/console
2. FMW Control (as the WebLogic Admin user)
http[s]://<hostname>:9001/em
3. ODSM Console
http[s]://<hostname>:9001/odsm
Once you logon to odsm console from browser
Click on connect to a directory and click on create a connection
Select Directory Type as OID and provide server,port,
username and password details and click on connect.


Thanks,
Aditya.