Installation and Configuration OIM12C In Cluster
Installation of OIMQS and OIMInfra Software
1.3 Execute
below command and follow the screen shots "java – jar fmw_12.2.1.3.0_infrastructure.jar"
2. Choose whichever option you need.
5. Select Next and wait for completion to
100%.Here it will check for
2. Installation of OIMQS12C
Oracle Database details and click on Next
It can be
any.In my case PROD is given.
and
click on Create
1.5. Choose Oracle Identity Manager -12.2.1.3.0 [idm] under
1.6 Dev recommends using JDBC over the default File based stores,
even for non-clustered and simple single node cluster install.
Domain Location and Application Location
1.8 In Administrator Account provide a username.
as RCU data in my case I have selected as RCU Data if you want to select
2.3 If you are going with Manual Configuration provide as below
info required or click on Next
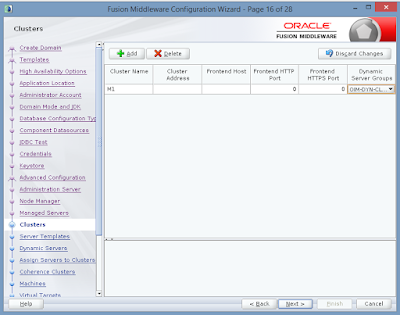
and add a cluster provide details required as per your
configuration or requirement
3.3 Assign Servers to cluster M1
3.4 Click on Next
3.5 Click on Next
3.6 In Machines you can add a machine and provide details
required as per below screenshot
3.9 Click on Next
4.0 Click on Next
4.1 Click on Next
4.2 Click on Next
4.3 Click on Next
4.4 In Configuration Process you must see
the next screen with 100%.
Domain Location and Admin Server URL.
(via the xlclient.sh script in $MW_HOME/idm/designconsole),
Thanks,
Aditya.
Installation of OIMQS and OIMInfra Software
Installation
of 12c "Oracle Fusion Middleware infrastructure
" Software must be done as a first step
Execute following command and follow the
screen shots.
1.1 .Go to the location where
software’s are placed in your environment
1.2. Inside
OIMInfra you should be able to see
fmw_12.2.1.3.0_infrastructure_Disk1_1of1
Inside fmw_12.2.1.3.0_infrastructure_Disk1_1of1 you
should be able to see fmw_12.2.1.3.0_infrastructure.jar
for installation and below screen shots are
as following:
2. Choose whichever option you need.
Here it has been selected
option to skip Auto updates and select Next
3. Choose the directory into
which Infrastructure must be installed.
Select Oracle_HOME as /u04 and
select Next
(In my case Oracle_Home is /u04
defined your location
as per your environment)
4. In Installation Fusion Middleware Infrastructure is selected by
default
operating system certification
and java version used to
launch the installer
6. In installation summary if
you want to save
Response File save it and click on Install
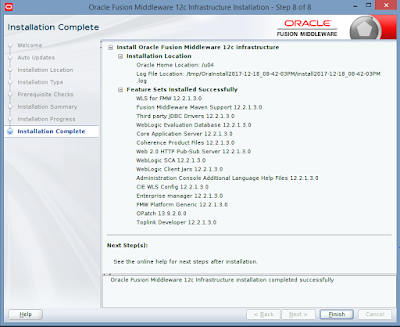
7. Click on Next and wait until
its completes 100%
2. Installation of OIMQS12C
2.1 .Go to
the location where software’s are placed in your environment
In
my case it is /home/oracle/IDAM12C/OIMQS
2.2. Inside
OIMQS folder you should be able to
see
fmw_12.2.1.3.0_idmqs_Disk1_1of2 and
fmw_12.2.1.3.0_idmqs_Disk1_2of2
2.3 Inside
fmw_12.2.1.3.0_idmqs_Disk1_1of2 you should be able
to see fmw_12.2.1.3.0_idmquickstart2.jar
&
fmw_12.2.1.3.0_idmquickstart.jar
fmw_12.2.1.3.0_idmquickstart.jar
Note:-Copy fmw_12.2.1.3.0_idmquickstart2.jar file from
fmw_12.2.1.3.0_idmqs_Disk1_2of2 to
fmw_12.2.1.3.0_idmqs_Disk1_1of2.Find below
screenshot for reference
screenshot for reference
2.4 java –jar fmw_12.2.1.3.0_idmquickstart.jar
2.5 Once if you hit enter on command above GUI prompt
appears
1. Select Next
2. Choose whichever option you need.
Here it has been
selected option to skip Auto updates.Select Next
3. Choose the directory into which Infrastructure must
be installed.Select Oracle_HOME as /u04 and select Next
(In my case Oracle_Home is /u04 defined
your location as per
your environment)
4.Click on Next and wait until its completes 100%.
save it and click
on Install
6.
Wait for it to complete 100%. Select Next.
7. Click on Next
3. To Configure OIM in domain
1. Creation of Schema using RCU: Creating database schema using
Repository Creation Utility to be installed and configured.
The database should be up and running.
1.1. Start the RCU – Execute following command
/u04/oracle_common/bin/rcu
In this case we are using location /u04/oracle_common/bin/rcu
Screen shots are as follows below
1.2. Once if you hit. /rcu you will get GUI
window ,
in Repository Creation Utility
welcome screen Select Next
1.3. In Create
Repository by default “Create Repository” and
“System Load and Product
Load” is selected. Select Next
1.4. In Database
connection details you must provide youOracle Database details and click on Next
Note:-Ensure your Oracle Database
is up and running. Note here
“Connection Parameters”
option is selected. And Database
Type selected is “Oracle Database”.
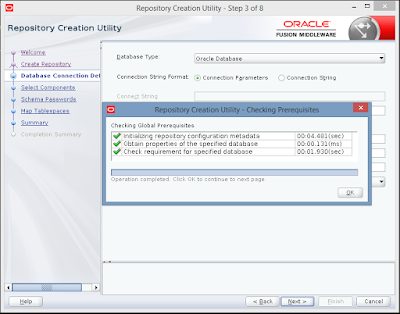
1.5 Here it will check for prerequisites
and select ok once it completes.
1.6.
In Select components select create New Prefix and provide a value.
And also
choose Oracle Identity Manager in IDM schemas and
click on Next
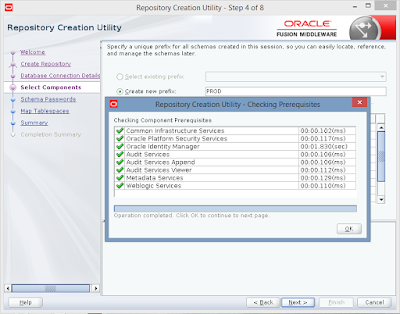
1.7. Here it will
check for component Prerequisites, once checking is
done
select ok.
1.8. In Schema Passwords section
in my case I am using same password
for all schema
is selected by default.
Provide a password and select Next
1.9. In Map Tablespaces screen select Next
2.0 Select Ok on pop
up window and click on Create
Save response file if required for reference.
Note down database
details
2.1 Once it is complete in completion summary note down
rcu
log and other log paths it shows.And click on Close
4. Configuring OIM domain using the configuration wizard
1.1 In my case in
following below location /u03/oracle_common/common/
1.2 run ./config.sh
1.3 Following below screen appears Default Create a new
Domain is selected
It would be the same as OAM and Infrastructure directory Path
(in my case it is /u04/)under which Domain must be created
In my case Domain Location
Select Next
1.4 Click on Next 1.5. Choose Oracle Identity Manager -12.2.1.3.0 [idm] under
Templates wizard screen.Note that this makes
Oracle SOA Suite and Oracle Enterprise Manager auto selected.
Select Next 1.6 Dev recommends using JDBC over the default File based stores,
even for non-clustered and simple single node cluster install.
This doc does not address Server
Migration, but enable it if you
desire to proceed with that feature.For dynamic cluster,
pick JDBC for the
JMS store and leave JTA as the default.
Domain Location and Application Location
1.8 In Administrator Account provide a username.
Weblogic is the default username it takes.
You can continue or change the name.
Here weblogic username is given.
Select Next
1.9 In Domain Mode and JDK choose either of the option.
Here in my case Production is selected.Ensure JDK path is correct.
Select Next
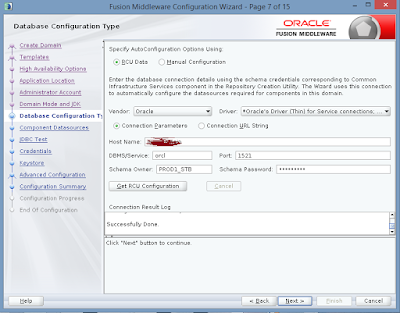
2.0 In Database Configuration Type select auto configuration
type as RCU data in my case I have selected as RCU Data if you want to select
Manual
Configuration you can go ahead with Manual configuration also
2.1 Provide
database details in which schemas were created using RCU
in
previous step,
under
Database Configuration Type screen.
Under
Connection Parameters provide correct details.
2.2 Click/select
Get RCU Configuration.
2.3 If you are going with Manual Configuration provide as below
info required or click on Next
2.4 In JDBC test ensure
that test selected are successful .Once successful click on Next
2.5 Enter the
various credentials keystore username should be keystore
enter the OIM Schema user for OIMSchemaPassword and
the
actual password used from the RCU steps your chosen
password for xelsysadm(keeping in mind the OOTB password
policy requirements, 1 Upper, 1
lower, 1 number, 8 chars min)
and
the WLS Domain user and password chosen earlier on the
Administrator Account page
2.6 In Advanced Configuration do not select any component until and
unless
if you want to set
some advanced configurations. Here in my case
i have selected
Administration Server,Node Manager,Topology,
Domain Frontend Host
Capture and Deployments and Servers
Note:-Select Options
as per your requirement.
Then click on Next
2.7 In Administration Server provide Server Name,Listen
Address,Listen Port
If you want to use SSL select Enable SSL or Click on Next
2.8 In Node Manager configuration in my case i am using
Node
Manager Type as Per Domain Defult location.
Base on requirement you can choose Node Manager Type
and
provide Node Manger credentials and click on Next
2.9 In cluster if you want to create a cluster click on
Cluster Nameand add a cluster provide details required as per your
configuration or requirement
In my case i am configuring cluster click on Next
3.0 Click On Next
3.1 Click On Next
3.2 Click on Next
3.3 Assign Servers to cluster M1
3.4 Click on Next
3.5 Click on Next
3.6 In Machines you can add a machine and provide details
required as per below screenshot
Click on Next
3.7 Here as per below screenshot you can add servers to
Machines3.9 Click on Next
4.0 Click on Next
4.1 Click on Next
4.2 Click on Next
4.3 Click on Next
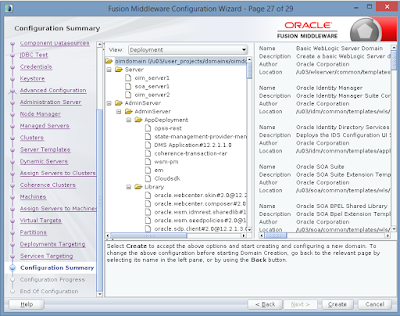
4.4 In Configuration Process you must see
the next screen with 100%.
Then select
Next and note down the
Domain Location and Admin Server URL.Then select
Finish
Domain Location and Admin Server URL.
Then
Click on Finish
Post Configuration Steps
1. Now add a new env var:
JAVA_OPTIONS=-XX:+UnlockCommercialFeatures
-XX:+ResourceManagement -XX:+FlightRecorder
- Add a new env var for the DOMAIN_HOME as
well, if not done previously:
DOMAIN_HOME=\u03\user_projects\domains\oiamdomain - Optionally you can add a boot.properties file
in %DOMAIN_HOME%\servers\<serverName>\security
for example for AdminServer, oim_server1 and soa_server1 - The boot.properties files should contain the
following in plain text, and when the servers are started from the command
line, the plain text values will be hashed:
username=weblogic
password=XXXXXX - Run the setDomainEnv script from
%DOMAIN_HOME%\bin, in order to set up all of the required environment
variables.
On Unix run it as a dot command, such as:
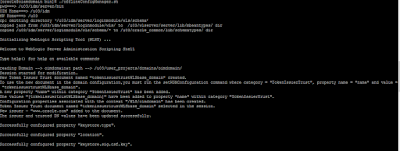
. setDomainEnv.sh - Then cd %MW_HOME%\idm\server\bin and run the offlineConfigManager.bat / sh script
7. Here It asks for Doamin Home--enter domain home as per your configuration
In my case it is \u03\user_projects\domains\oimdomain and press enter
8.The above step could take a couple of minutes to complete.
Testing:-
1. Go to below path and start Weblogic server and OAM managed servers.
/u03/user_projects/domains/oimdomain/bin/startWeblogic.sh
/u03/user_projects/domains/oimdomain/bin/startManagedWeblogic.sh
soa_server1
soa_server1
/u03/user_projects/domains/oimdomain/bin/startManagedWeblogic.sh
oim_server1
oim_server1
/u03/user_projects/domains/oimdomain/bin/startManagedWeblogic.sh
oim_server2
oim_server2
2. Access the Weblogic,SOA, OIM URL from Chrome, Firefox or I.E etc... and
verify its working fine.
Note:-
Add the following to
the Arguments box in the
<server_name> -> Configuration -> Server
Start tab
-XX:+UnlockCommercialFeatures -XX:+ResourceManagement -XX:+FlightRecorder
The above should be
done for each WLS Server, AdminServer, soa_server1, oim_server1, oim_server2…
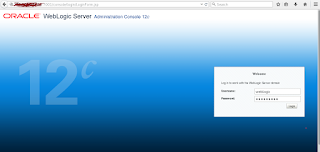
Specify username as weblogic and enter password and confirm password
Click on save and activate changes
Below are screenshots for reference
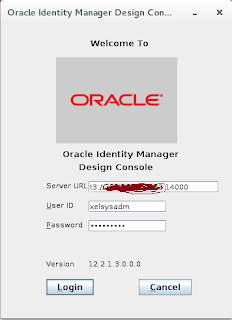
Below are screenshots for Weblogic,SOA , OIM & Design console
OIM,SOA,Weblogic &Design Console Validation and Setup
Now you should be able to logon and perform other tests and config changes etc…
1. Logon as xelsysadm to the OIM self service console,
http[s]://<hostname>:14000/identity
2. Complete the Password Management setup for
the xelsysadm user
3. Now navigate to the Admin Console to perform additional OIM
specific config modifications,
http[s]://<hostname>:14000/sysadmin
4. Verify access to the following locations Self Service
http[s]://<hostname>:14000/identity
5. OIM Admin Console http[s]://<hostname>:14000/sysadmin
6. SOA Composer (as the WebLogic Admin user)
http[s]://<hostname>:7003/soa/composer
7. SOA Infra Platform (as the WebLogic Admin user)
http[s]://<hostname>:7003/soa-infra
8. WLS Admin console (as the WebLogic Admin user)
http[s]://<hostname>:7001/console
9. FMW Control (as the WebLogic Admin user)
http[s]://<hostname>:7001/em
(via the xlclient.sh script in $MW_HOME/idm/designconsole),
Ensure that the setDomainEnv script has NOT been run in
the
same terminal window or tab
11.Update the logon URL in the same
format as presented
and the xelsysadm user and password,to verify functionality.
Thanks,
Aditya.






















No comments:
Post a Comment